
In this chapter, we’ll show you how to easily add, update and remove your products from Dropshipzone. We’ll also introduce you to the Catalog and Bulk Imports menus, where you can get a general overview of your products and quickly upload or update multiple products at once.
How to add a new product
- To add a new product, navigate to the ‘Manage Products’ page under the Catalog menu.
- Click the ‘Add New Product’ button to open the Add Product page.
- At the top of the page, you will see four tabs: Details, Price, Shipping and Images. Use these tabs to input product details, product prices, shipping rates and product images.
- Fill in the required fields for each section. Note: When choosing your product sub-subcategory, be as precise as possible. If you do not include a product category, you will be prompted after clicking submission.
- Click on ‘Submit for Approval’.
- Your product will appear on the Manage Products page as Pending New until it is reviewed, at which point it will appear as Accepted or Rejected.

How to add products in bulk
The Bulk Imports menu allows you to upload multiple products at once, saving you time and getting you up and selling faster. All you need to do is download our easy-to-use templates and fill out your product information for your products to start being offered on Dropshipzone. You can also view our step-by-step tutorial.
- To add products in bulk, select ‘New Products’ under the Bulk Imports menu.
- Click ‘Template’ to download the CSV template you will use to upload your products.
- Click ‘Categories’ to download sub-subcategory product codes. This will allow you to submit products to the correct product categories.
- Click ‘Postcodes’ to download the Postcode Zone Mapping CSV file. This document outlines our shipping zones, allowing you to calculate accurate shipping fees.
- Fill in the relevant fields. Please ensure that you have filled all the required columns, or the system will report an error message.
- If you have left sub-subcategory cells blank, our AI system will automatically assign category IDs to your products.
- Insert image URLs into the Image column to upload your product images. If there are multiple images, please separate image URLs with a comma ‘,’.
- Upload the completed file. The products will be submitted for approval automatically. (Note: The completed file name must not contain any spaces or symbols.)
- For Suppliers who have left some or all sub-subcategory fields blank: Once the completed file is uploaded, products that are confidently mapped will be automatically uploaded pending approval. You will be prompted to review the remaining products to ensure they are assigned the correct categories.

Template Fields:
Here is a detailed description of each template field and its requirements.
✔ SKU: Product SKU code (please only use numbers, uppercase letters and hyphens ‘-’ as spaces. No other special characters or spaces are permitted).
✔ SKU title: Product title.
✔ Parent SKU: Parent SKU code (upper case & use hyphens instead of spaces).
✔ Parent SKU title: Product title within Parent listing.
✔ Option 1 name: Product variation type 1 (e.g. size).
✔ Option 1 value: Variation values (e.g. small, medium, large).
✔ Option 2 name: Product variation type 2 (e.g. colour).
✔ Option 2 value: Variation values (e.g. red, blue, green).
✔ EAN Code: A thirteen-digit barcode number (ISBN, UPC, GTIN, etc. is acceptable).
✔ Set to a text format before submission to ensure it displays properly.
✔ Description: Product description, specifications, features, and package contents. Must be in HTML code format.
✔ Status: Use ‘1’ for enable, ‘0’ for disable.
✔ Price (Incl. GST): The product selling price on Dropshipzone.
✔ RRP (Incl. GST): The recommended retail price.
- Leave blank where no RRP is provided.
- Use ‘Null’ to remove the RRP for existing SKUs.
✔ Zone Rates (Incl. GST): Put ‘0’ for free shipping, ‘9999’ for undeliverable zones.
✔ Stock: On-hand stock / Inventory.
✔ Sub-subcategories: Fill in the relevant sub-subcategory code. Refer to the Categories code file in New Products for category codes. Note: If you do not choose a product category, our AI system will automatically assign category codes to your products.
✔ Images: Image URLs. Use images with a white background for the head photo.
- Dropbox links or Google Share Drive links are not acceptable.
- Please separate image URLs with a comma ‘,’ for multiple images.
Product approval
Providing detailed and accurate product information is the fastest way to get your products approved. Here is how you can ensure your product listings meet our approval criteria:
- Title: Must clearly describe the product and indicate colour, size, and other key identifiers.
- Description: Needs to be in HTML format, and cannot contain any links to websites or documentation. You must also provide package contents.
- Image: Ensure the URLs provided are valid and the main image has a white background. The URL of your website, Google Share Drive links and Dropbox image links are not acceptable. For more details please refer to image requirements.
- Prices: Must include a valid price (no letters, negative values or predatory prices) and freight charges. RRP is optional.
We will contact you to modify your submission as needed. A submission will be rejected if the provided information does not meet the required standards. You can contact supply@dropshipzone.com.au to learn why your product may have been rejected and how to rectify any issues.
How to check the status of your product
- Click on ‘Manage Products’, under the Catalog menu. From here, you can view your full range of products and their approval status.
- You can view product approval status in the product records displayed, or by using the product filter. You can search by product name, ID, SKU, EAN code or approval status.
When checking the status of your product, please note that Dropshipzone has five different approval codes:
- Pending New: New product has been submitted and is waiting for approval by Dropshipzone. You can still edit the product information at this stage prior to approval.
- Approved: Product has been approved for listing on Dropshipzone.
- Rejected: Product has been rejected for listing on Dropshipzone.
- Pending Price Update: Product has updated product information that is awaiting approval by Dropshipzone.
- Pending Product Update: Product has updated price information that is awaiting approval by Dropshipzone.
How to update product information
If you want to update product information on Dropshipzone, follow these instructions:
By clicking on the product detail page, you can edit and submit changes for a single product, including product information and price updates.
- Click the magnifying glass icon next to the relevant product ID to enter the Product Detail page. From here you can change product Details, Price, Shipping and Images.
- Fill in the new product information.
- Once the updated information has been filled in, click on ‘Submit for Approval’ to have your changes reviewed. (Note: These changes will only come into effect on Dropshipzone after approval.)
Updating product pricing
As a Dropshipzone Supplier, you can update product pricing during our Price Review submission window. Price Reviews occur twice a month and include a 7-day Price Review window for Suppliers, followed by a 6-day Price Review window for Retailers and a final Price Effective Date. You are welcome to change prices multiple times during the submission window. At the Price Effective Date, the latest price updates will be exported to Dropshipzone. Updated prices will show under Pending Value until the new prices are approved.
Note:
- Price, RRP and shipping changes will only be available when the Price Review window is open.
- The Price Review Service is only available for existing product prices and shipping updates.
- Price Review submissions will be rejected if:
- The SKU is in a Promotion Event.
- The Price Effective Date for a submitted price change occurs on any day during the promotional period.
How to update products in bulk
- Under the Bulk Imports menu, go to Existing Products and click on ‘Info Update’.
- Click on ‘Template’ to download the CSV template to upload your new product information.
- Fill in the relevant fields.
- Insert image URLs into the Image column to upload your product images. If there are multiple images, please separate image URLs with a comma ‘,’.
- Upload the completed file. The products will then be submitted for approval automatically.
How to remove a product
If you want to remove a product from Dropshipzone, follow these instructions:
- Go to the Product Detail page
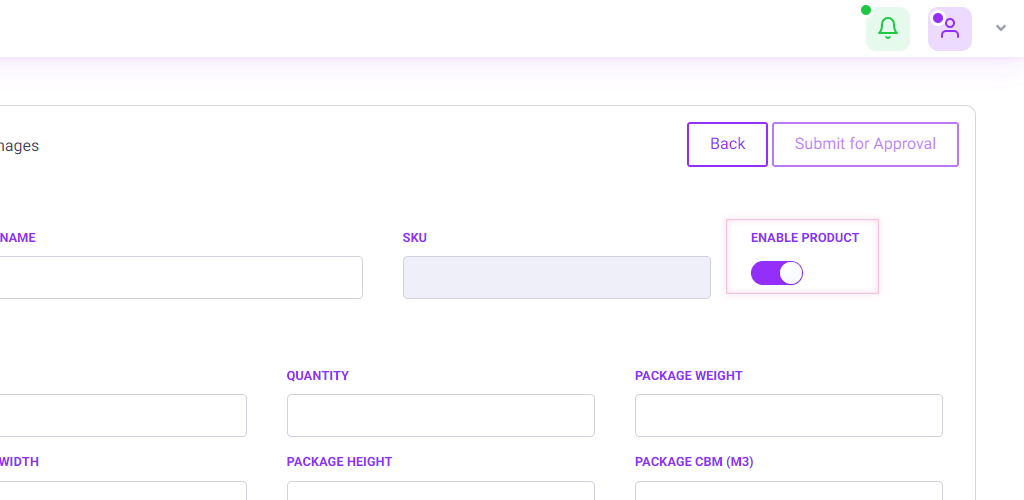
- Enable or Disable your products by clicking the ‘Enable Product’ slider.
A grey slider shows the product is disabled, while a purple slider shows the product is enabled. This change will be applied immediately upon submitting the page for approval. Disabling a product will remove it from Dropshipzone, and inventory will automatically change to ‘0’.
Tips on pricing products
As a Supplier on Dropshipzone, you will need a competitive pricing strategy in order to attract Retailers. You may need to experiment with different price ranges to find the right balance for you in terms of profit and brand appeal. Here are some tips for choosing optimal pricing for your products:
- Suppliers should consider traditional B2B wholesale pricing when setting product prices.
- Calculate your break-even point and price your products accordingly.
- Pricing is an ongoing process. You should review your product prices regularly to account for changes in production costs, supply and demand and the competitive landscape.
How to select product images
Product images are an important part of attracting customers. Retailers will rely on your images to sell your products, so it’s important to upload attractive, high-quality images.
- From the Edit Product page, click on ‘Images’.
- Click on ‘Add Image’ to upload your chosen product image.
- You cannot directly upload images to Dropshipzone. Before uploading, you will need to convert your image into a URL link. For instructions on how to get URL links from Shopify, click here. For a secondary solution or to read more about image URLs, click here. (Note: Product URLs, Dropbox links and Google Share Drive links are not acceptable.)
- Paste image URLs into the prompted box. Please note, multiple image URLs will need to be separated with a ‘,’ between each URL, or only the first image listed will be uploaded to the platform.
- The first image uploaded will be set as the main image. You can click and drag images to adjust the image placement.
- Click ‘Remove’ to remove a product image.
- Click ‘Submit for Approval’. Your product images will not be uploaded until they are approved.

Product image requirements
Dropshipzone has specific image requirements in order for images to display properly on the website. Image requirements are as follows:
- The image link should be valid and end with a valid image format. Note: The webp. format cannot be displayed.
- The image needs to be square or it will not display properly.
- Multiple image links should be separated by a comma.
- Image size must be less than 20M.
- The image must have a solid, non-transparent background.
- No logos, letters, text or links/URLs are allowed to be shown in the image.
- The main image should have a white background.
- Share drive links (e.g. Google Drive or Dropbox) are not submittable.
How to export product information in bulk
This will allow you to view product information in bulk as a CSV file.
- From Manage Products, select ‘Export All Products’ for all product details.
- To export specific products, select the required products and click the ‘Export Selected Product’ button.
- Your product details will be downloaded as a CSV file for viewing.
Frequently asked questions

Dropshipzone welcomes products across a wide range of categories. Our top product categories include furniture, appliances, pet supplies, sports and outdoors, and health and beauty.
If you’re unsure about a certain product, please refer to our Banned Products Policy. While the sale of alcohol is not prohibited on Dropshipzone, there are certain rules and regulations Suppliers need to follow. They can be viewed in our Sale of Alcohol policy here.
Some products cannot be sold on Dropshipzone according to Australian product safety laws. It is the responsibility of Dropshipzone Suppliers to keep abreast of product safety obligations according to the law. You can find an updated list of banned products at Product Safety Australia.
No. We don’t specify MOQs at Dropshipzone. This helps keep our marketplace more accessible for Suppliers and Retailers alike.
We encourage Dropshipzone Suppliers to avoid using logos and other brand identifiers on product images and packaging.
Yes. All products offered on Dropshipzone are GST-inclusive.
No, providing an RRP is optional. It is a useful addition to provide a benchmark for Retailers, who can then price your products accordingly.
A product may be rejected for a variety of reasons, including but not limited to:
- The provided product information is missing or incomplete.
- The product violates one of our marketplace policies.
If your product is rejected, you can try to upload the product again with the correct information or contact supply@dropshipzone.com.au for more information.
If your product listing is not being displayed correctly, you may have included product images that are incompatible with Dropshipzone. Here are some examples of images that may not display correctly:
- The images may not end in a valid image format. We accept all valid image formats except for webp., and we do not accept Google Share Drive links and Dropbox image links.
- The images may have incompatible dimensions. Product description images must be square and less than 20M in size.
- The images must have a solid, non-transparent background.
When creating or editing your product listing, you must also use HTML for it to display correctly.
If you are still having trouble with your product listing, please contact supply@dropshipzone.com.au for more information.
When adding new products, you will be asked to provide current stock levels so you can monitor your stock levels as you sell. We recommend that you indicate more than 20 units of inventory as any lower quantity will be marked as ‘low in stock’ on Dropshipzone. If you are using our APIs to sync your inventory, you can set automatic buffers to alert you when stock is low - contact your IT team for more information.
You can update your product prices from the Product Detail page or by using the bulk product update CSV file.
However, price changes can only be made during our Price Review submission window. Price Reviews occur twice a month and include a 7-day Price Review window for Suppliers, followed by a 6-day Price Review window for Retailers and a final Price Effective Date. You are welcome to change prices multiple times during the submission window. At the Price Effective Date, the latest price updates will be exported to Dropshipzone. Updated prices will show under Pending Value until the new prices are approved.


